Investment Castingcopy link
How to cast mechanical parts out of aluminum on a budget
overviewcopy link
Investment casting (or lost wax casting) is a great choice for projects that require large, complex, or detailed metal parts on a budget. The comparison chart below should help you decide if this is the right process for your project.
pros
- Preserves polished surfaces and reproduces tiny, sharp details
- Temperature resistant (starts deforming at
500°F) - Mechanically strong (
3.5%elongation at break)
cons
- Complicated process that requires precision and time to get any results
pros
- Easy and relatively cheap to get started
- Quality of results scales progressively with skill
cons
- Grainy surface, requires advanced techniques and extensive finishing
- Parts come out "blurry", does not reproduce very small or complex details
pros
- Easy to get good results after a few attempts
- Quality of results scales progressively with skill
cons
- Partially composed of resin, deforms at
90°F, not fire proof - Requires finishing for seamless metal appearance
pros
- Less toil, skills, and experience required
- Parts can be ordered from an online service with a few clicks
cons
- Equipment and service too expensive for a large number of parts
- Still requires finishing and weaker than cast parts (
1%elongation)
process stepscopy link
The original model is cast four times (two positives and two negatives), with the final positive cast out of the chosen alloy.
- The first negative is a rubber mold, with the original model released and the resulting cavity filled with wax.
- The wax pattern is removed from the rubber mold, attached to a rubber base with sprues, and put inside of a steel cylinder called a flask. The flask is filled with specially formulated plaster called investment. If the part is too large to fit in a flask, it can be invested by building a ceramic shell over several iterations of dipping in slurry and sifting sand.
- When the investment sets, the wax is steamed out, leaving a hard ceramic mold. This mold is fired in a kiln to evacuate water and strengthen the investment.
- Metal is poured to cast the final positive. Flasks used in investment casting are perforated to enable vacuum-assist casting, which forces the air out of the mold and pulls the metal in to fill intricate details.
Aluminum casts can be up to 5% smaller than the original model.
making a rubber moldcopy link
To make a rubber mold, build a box slightly larger than the model, fix the model in the box, and fill it with room temperature vulcanization (RTV) rubber.


If you cut the model out of the mold you will produce a one-part mold. Releasing a fragile wax pattern from this mold could be next to impossible without breaking it. For this reason, complex models require two-part molds.
You can also create additional geometry at this stage to aid degassing or to add strength to the wax pattern cast from the mold.
- Cut vents directly into the rubber mold in concave areas where you find large bubbles collecting and preventing a complete fill.
- Add supports to strengthen thin areas that would break when de-molding.
Entrapped gas is a concern with rubber molds as any bubbles at the surface of the model will become filled spheres on a cast positive. To prevent this, spray the model with a mold release compound before pouring.
casting a wax patterncopy link
The wax copy of your model is called a pattern. Select the wax for your pattern by experimenting with different expansion ratios.


- If the expansion ratio is too high, investment could be cracked by expanding wax during autoclaving
- If the expansion ratio is too low, wax casts will be brittle and difficult to remove from rubber molds without breaking
The tools and process required to cast wax patterns from rubber molds depend on the size of the parts:
- Small parts can be cast with a wax injector used for jewelry casting.
- Large parts require several iterations of pouring wax into the mold and degassing in a vacuum oven. Wax can be melted in a Presto pot and poured into a pre-heated mold.
spruing and gatingcopy link
After you chase the wax pattern by removing any vents and supports with a wax pen, attach it to a rubber base using sprues. When you invest the flask later, the rubber base will give the top of the flask a funnel shape for pouring.
Connecting sprues to the rubber base and the model with sticky wax will also reduce re-work and form stronger connections. A poorly attached wax pattern will break off the base and float to the surface as the flask is being invested.
Use fewer sprues and place them at strategic points (gates) following thin sections, which will give the metal alternate pathways for filling the mold before solidifying. Placing too many gates in close proximity will cause turbulence from several streams of molten metal colliding under pressure and wasting energy otherwise used to fill mold details, which will result in incomplete fills. Turbulence can also break off small internal features of the mold and they will end up being embedded in the casting as “inclusions”.
mixing investmentcopy link
Select investment based on the size of the parts to be cast:
- UltraVest is a good choice for small to medium size aluminum parts that could fit into
6" x 9"(or smaller) flask - SuspendaSlurry FS is great for larger aluminum parts that could be dipped into a bucket of slurry
Deionize the water before mixing it with investment to filter out mineral particles that weaken the mold. A few deionizers are listed in tools & supplies.
- When investing a flask and several investment mix ratios are available, select a ratio resulting in the strongest mold (more investment) while providing enough working time (more water). Degass the investment in a vacuum chamber while vibrating it with an oscillator
- When investing with slurry no mixing is needed. Stir the slurry before every use and add water only if the slurry becomes too thick
If the investment molds have bubbles, spray a layer of anti-sticking compound such as VacuFilm on the wax patterns before investing.
investingcopy link
If casting in a flask, place the flask on top of a rubber base with the wax pattern, attach it with painter’s tape, and use the same tape to cover flask perforations.


If dipping in slurry, it takes about 11 dips to create a strong mold. One layer of slurry dries in about 1.5 hours when heat and fans are used to speed up the process. Sift fine silica sand on the first 3 layers and course sand on the other layers after each dip.
autoclavingcopy link
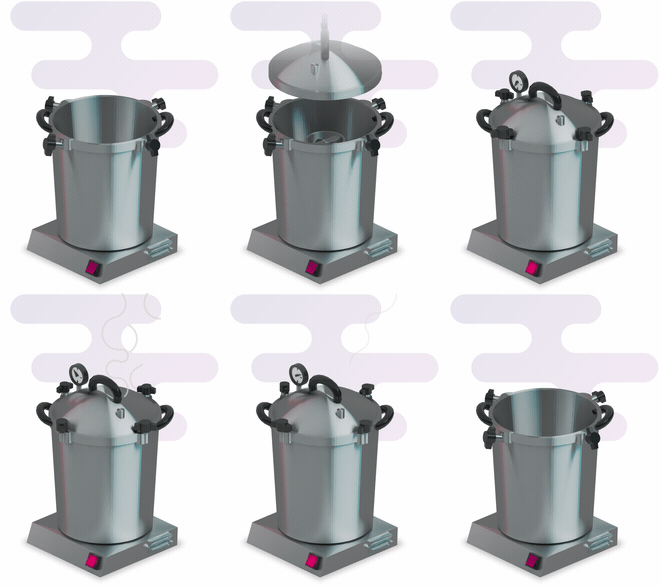
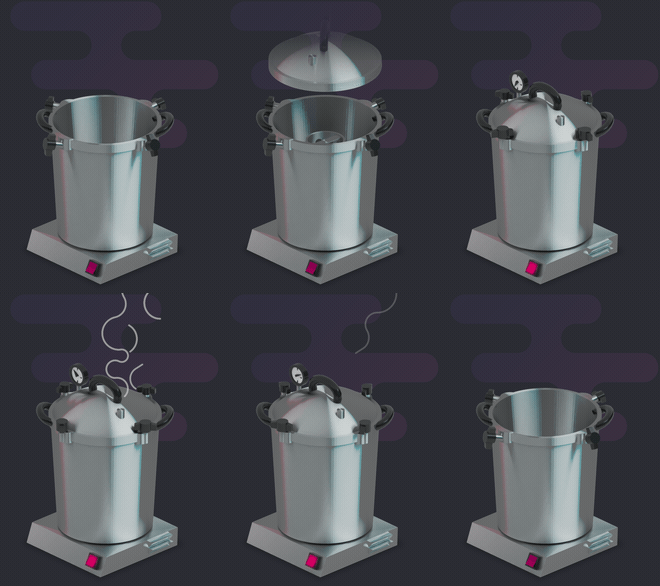
Wax is evacuated from from the mold by autoclaving. This requires a pressure cooker filled with an inch of water and a stove to steam the wax out of the mold through the pouring cup. The steam causes the outer layer of wax to permeate into the mold, leaving space for the wax to expand and trickle out.
burnoutcopy link
Following wax removal, burn out the ceramic molds in a kiln using the schedule provided by the investment supplier in order to evacuate water and fuse fibers in the micro-structure of the mold. Transfer autoclaved molds directly into a pre-heated kiln to avoid cracking from rapid cool-down.
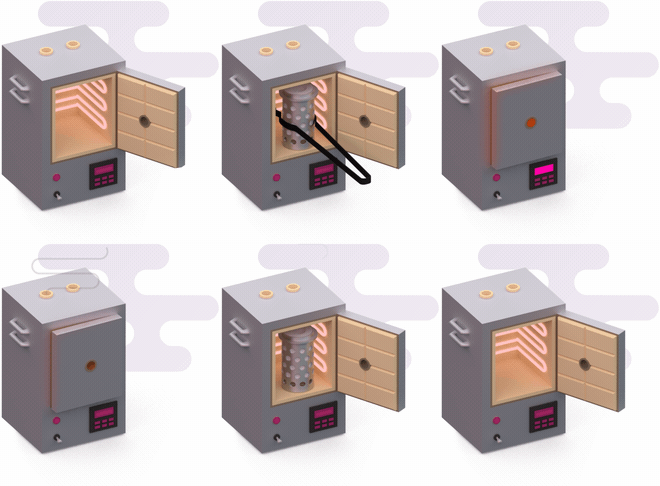
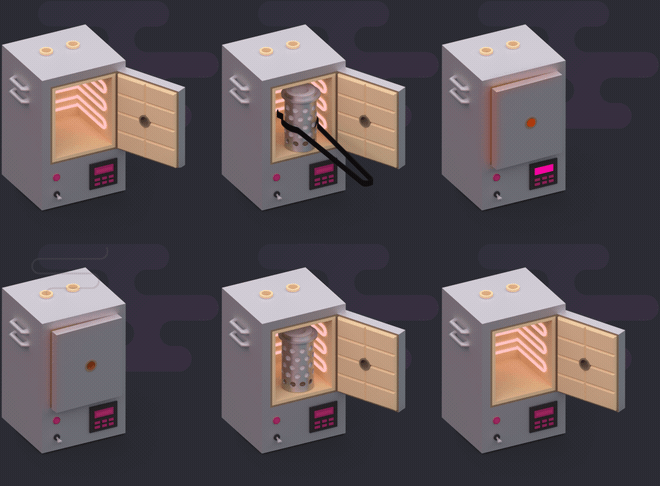
Running a kiln requires a metal desk, a room with a stone floor, all non-ceramic surfaces covered with sheet rock, corners sealed with fire foam, and a ventilation system. Large kilns run on 220-240V similar to washers and dryers.
metal castingcopy link
Use an alloy designed for casting rather than machining. The 356 alloy is used for car engine blocks and computer heat sinks, so it’s easy to acquire on the Internet in the form of de-drossed and degassed ingots.
Your goal when casting is to transfer the flask from the kiln to the vacuum assist chamber and pour metal in 2 minutes or less. This avoids a thermal shock that can destroy intricate mold details as the flask rapidly cools to room temperature, causing them to break off and become embedded in the casting.
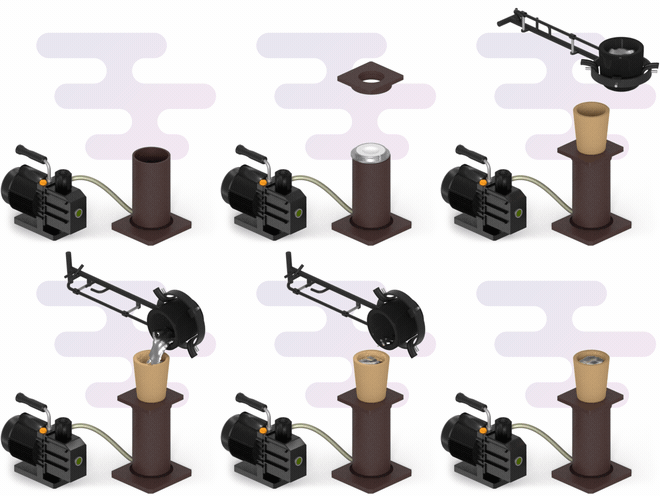

Once the metal in the crucible reaches the casting temperature, transfer the flask into the vacuum-assist chamber with a running vacuum pump. Use a temperature resistant O-ring to seal the flask flange to the top of the chamber.
This will generate vacuum around the outside of the flask, drawing gases inside the flask out through the walls. While the small gas particles can permeate the mold due to its porous microstructure, the metal cannot. Instead the metal will be pulled toward the walls of the mold, precisely capturing surface details.
If the vacuum is not enough to achieve a complete fill, you can attach a “riser” to the top of the flask to increase the weight of metal pushing down into the mold. Risers also let you pour quickly and avoid dangerous spills because they buffer the metal and feed it at a slower rate while keeping it hot. Install a ceramic filter inside the riser to prevent pieces of forge refractory, dust, and other unwanted particles from entering the mold and becoming inclusions.
tools & suppliescopy link
Tools and consumables mentioned throughout the article are listed here with a few budget presets.
- 12"x12"x11"
- $655
- 12"x12"x11"
- $670
- 12"x12"x11"
- $1100
- 12"x12"x11"
- $1390
- 16"x14.5"x14"
- $2190
- 1 pint
- $225
- 1 stage 7 cfm
- $180
- 1 stage 7 cfm
- $306
- 2 stage 9 cfm
- $390
- 2 stage 12 cfm
- $445
- 2 stage 11.3 cfm
- $2360
- 1.5 quart
- $56
- 1.5 gallon
- $78
- 3 gallon
- $95
- 5 gallon
- $105
- 8.4 gallon
- $174
- 4"x7" flasks
- $656
- 5"x7" flasks
- $1955
- 4"x9" flasks
- $7495
- 6"x7.6
- $250
- 4"x7.4" flasks
- $380
- 8"x10" flasks
- $600
- 10” 500 cfm
- $67
- 4” 172 cfm
- $116
- 4” 100 cfm
- $148
- 10” 810 cfm
- $167
- 12” 820 cfm
- $340
- 22 quart
- $62
- 23 quart
- $70
- 25 quart
- $30
- 30 quart
- $350
- 41.5 quart
- $500
- $5
- $17.64
- 1 pint
- $6
- 1 pint
- $10
- 1.5 quart
- $15
- 1 gallon
- $23
- wax pen tool
- $173
- ultra waxer
- $333
- wax pen tool
- $173
- multi wax pot
- $168
- cast iron ingot mold
- $23.42
- ladle shank
- $101
- graphite flask tongues
- $59.99
- 6" x 9"
- $109
- 4" diameter
- $12
- 5" diameter
- $13
- 6" diameter
- $18
- 4" diameter
- $68
- 5" diameter
- $68
- 6" diameter
- $69
- hi-HP motor
- $537
- 50lb box
- $56
- 100lb drum
- $90
- 100lb drum
- $128
- 14lb box
- $51
- 28lb box
- $90
- 43lb box
- $125
- 50 lb bag
- $86